We have updated the content of our program. To access the current Software Engineering curriculum visit curriculum.turing.edu.
Git Review - remotes/locals and forking/cloning
Vocab
GitA distributed version control systemCloningCopying a remote repo to your local machineForkingCreating your own copy of somebody else’s repoRemote RepoA repository on the web that allows others to view and contribute to your codeLocal RepoA repository on your machine that allows you to version control a directory
Goals
By the end of this lesson, you will be able to:
- articulate the difference between your remote and local repos
- articulate the difference between forking and cloning
- choose the appropriate method for copying a repo
- link remotes to your local repositories
Remote vs. Local Repo
When we’re working with git and GitHub, we usually have 2 repos that represent the same codebase:
- our local repo - which lives on our machine, where we make our changes and do our development. We
cdinto a project directory and edit our code files, we rungit addandgit commiton them, etc. - our remote repo - which lives on GitHub, where anyone can view our files and clone or fork their own local copy
Local Repos
Local repos live on our machines and allow us the full benefit of git’s version control.
In your terminal, create a new directory and cd into it. Now run git init – you’ve just created a local git repository!
We have no remote repository associated with this local git repository just yet, it simply lives on our machine and gives us all the version control features of git. So if you were to add files to this directory, we would be able to track any future changes to them.
Add a file to your directory, then run a git status. You should see that you have a single untracked file. This means that git can tell there’s a file in your current working directory, but it’s not keeping an eye on it yet. We haven’t told git that it’s important.
If we follow the instructions here and we do a git add, we see that file is now highlighted in green instead of red, and git is now aware of it as something that can be committed. This phase right here is called your staging area. It holds onto any file changes that you are considering committing to your local git repo. Notice if you do a git log, you still don’t have any commits to you local repo, so your local repo is still considered empty right now. If we were to try to push this up to GitHub somewhere, nothing would appear.
Given the workflow we just walked through, we can identify 3 separate environments or phases of working locally:
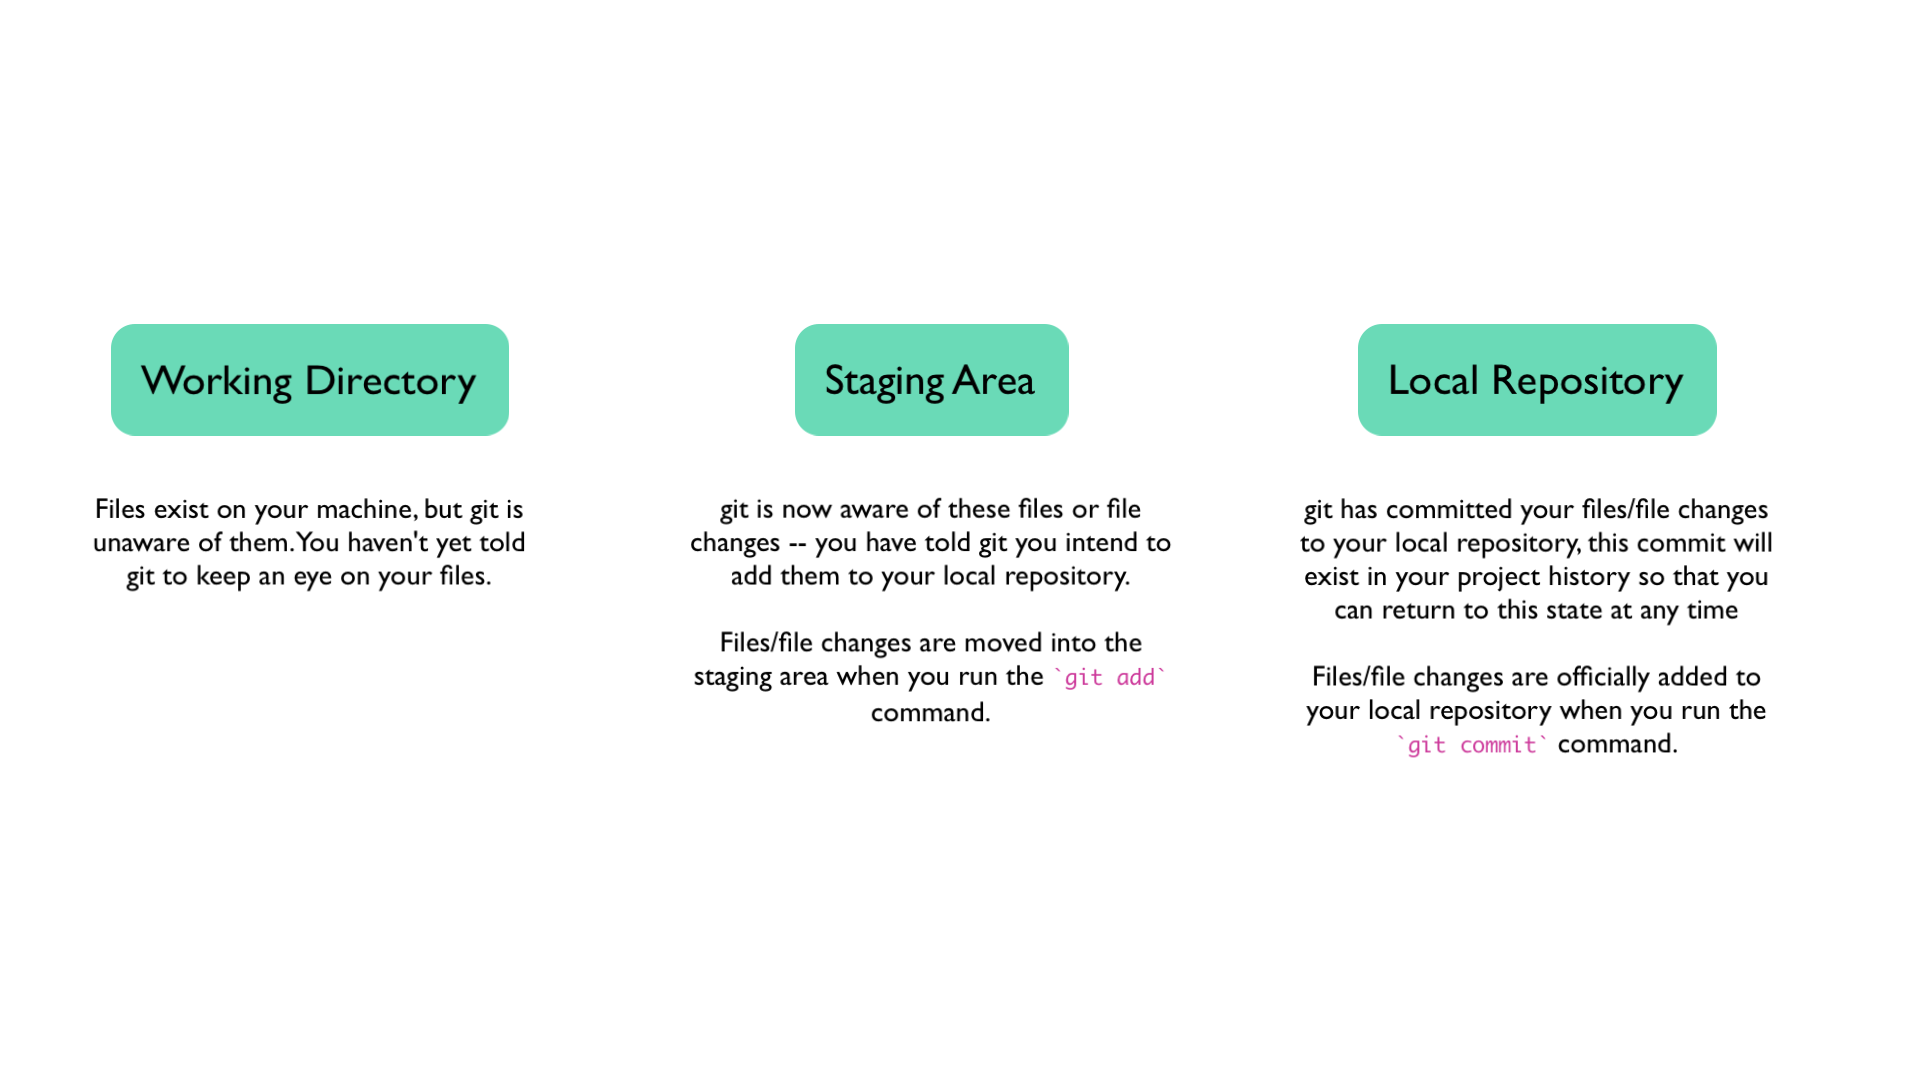
- the working directory: this has any files you’ve created that git is not yet aware of
- the staging area: any files or changes to those files that you’ve made git aware of by running
git add - the local repo: any files that you’ve actually committed to your local repo by running
git commit
So the important thing to remember here is that your files aren’t actually considered to be a part of your local repo until you’ve committed them.
Remote Repos
Though local repos provide you with full-blown version control, there are still some limitations:
- it’s hard to dig into your past commits and really see the history of your app so that you can make use of the version control - if you wanted to go back to a particular state of you application, it would be a little trickier to navigate there from the terminal when you can’t really see what the codebase looks like at each one of the previous commits
- if your computer gets hit by a bus, the whole app is gone
- only you can work on your local code
So, we often link our local repos to a remote repo! Remote repos:
- usually live somewhere (like GitHub) that has a nicer interface for us to navigate the app at different points in history
- provide us with a backup copy in case our laptop gets hit by a bus
- allows us to publish our code to the world so they can read or write it (imagine if you had a group project with no remote repo and you had to keep passing the laptop around for everyone to contribute)
So if we want to create a backup of a local repo, or share a repo with others, we need to create a remote repository that we can link our local to. You can tell a local repository about a remote counterpart by adding a remote with the following command:
git remote add <nameForRemote> <remoteRepoUrl>
Usually the default remote name is origin - which is how we get the command we’re most frequently running: git push origin master.
Most frequently, you’ll be working with one local repo linked to one remote repo, but we can actually have as many remote repos as we want, as long as they all have their own unique names. (e.g. we could add a remote called ‘turing’ by running git remote add turing <url>).
You won’t come across a ton of scenarios where you’re going to be pushing and pulling from multiple remotes, but it’s important to remember that it doesn’t have to be a strict 1-1 relationship between a local and remote repo.
Forking vs. Cloning
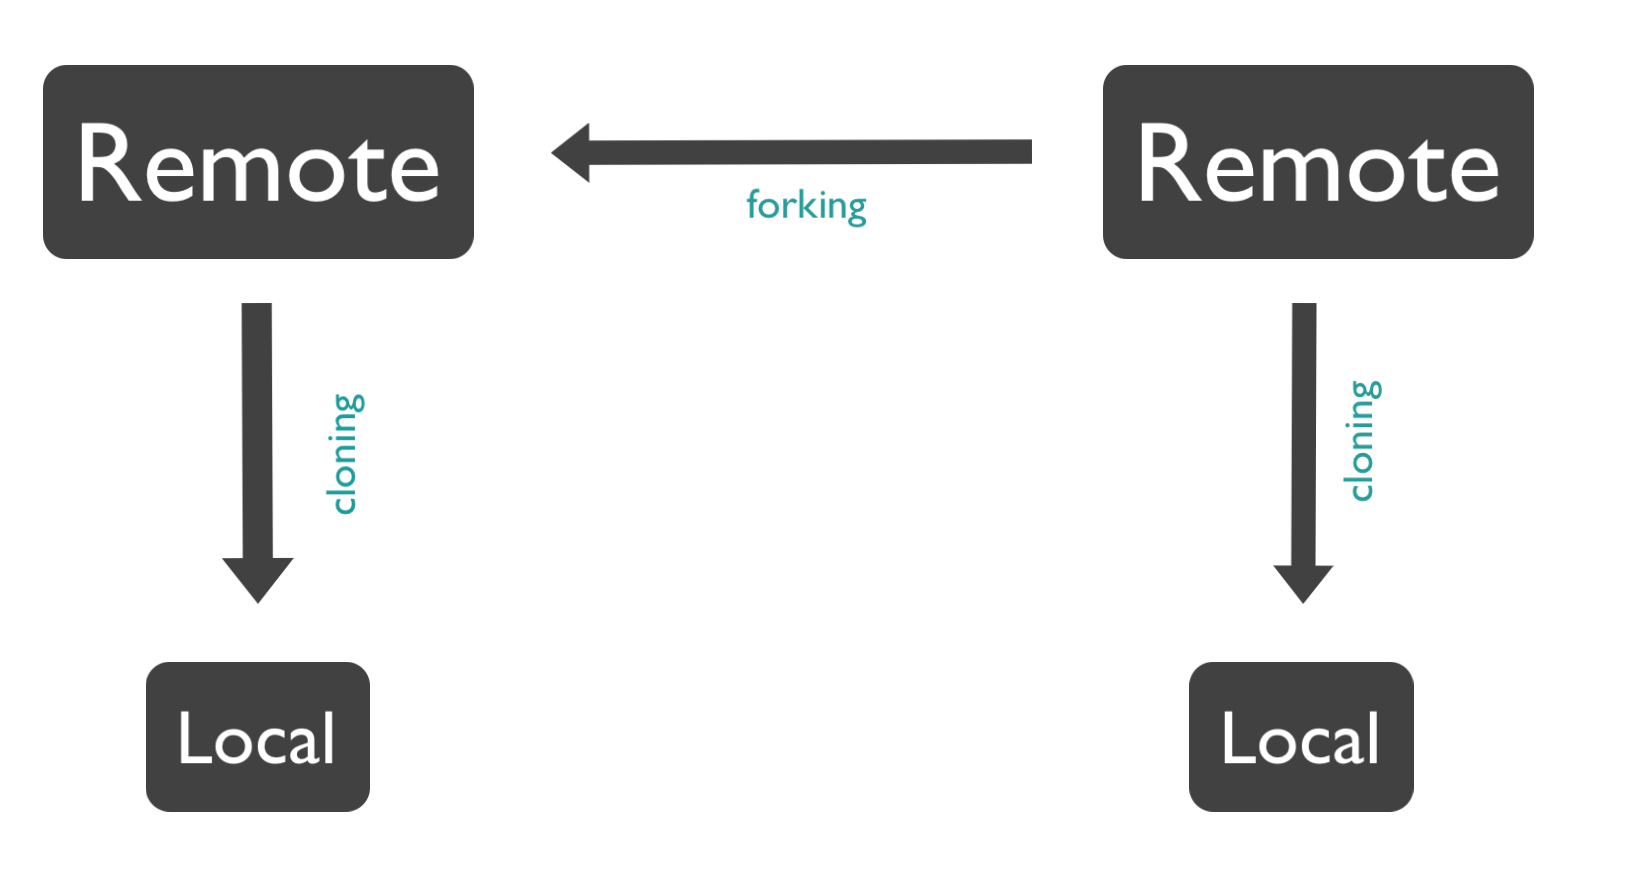
Now that we know the difference between our local and remote repos, let’s talk about the two ways we can get a copy of a remote repository: cloning and forking. These work in slightly different ways.
Cloning
Cloning a remote repository copies it to your machine as a local repository. When you clone a repo, the local repo it creates is automatically mapped to the remote (origin). Your local copy will have access to all of the branches that exist on that remote repository.
If new remote branches have been created since you initially cloned down, or any of the remote branches have been updated, you can update all of those remote branches by running git fetch.
While cloning allows you to copy down the original repo, if you are not a collaborator on that repo, and you want to push any local changes you’ve made to GitHub, you’ll have to create a new remote repository to push them to.
Which brings us to…
Forking
Forking creates a brand new remote repository on your GitHub account that’s a copy of the original. In order to work locally, you would then want to clone down your forked version of the repo. The forked version is now your origin remote where you can push and pull your local changes.
In order to keep up with (pull down) any future changes that occur in the original repo, you would need to add a remote link to that repo that your local copy could access. We can accomplish this with the following command:
git remote add <remote_name> <repo_url>
We could then pull down future changes like so:
git pull <remote_name> <branch_name>
If you want to checkout a new local branch, based on an existing remote branch, you can then do:
git checkout -b <new_branch_name> <remote_name>/<remote_branch_name>
TO SUMMARIZE
- Cloning: a remote repository will make a local copy on your machine with a single remote (
origin). Your local copy will now have access to all the commits and branches that exist on the remote repository. You can push and pull to that remote only if you are an approved collaborator on that remote. - Forking: a remote repository creates another remote repository, but not a local one. You must clone down your fork in order to push your changes.
How to Choose Between Cloning and Forking
-
Choose Cloning: when you are copying a remote repository that you have full access to – you’re going to be pushing and pulling changes to this repo and you’re in charge of it. On your group projects, you’re all going to be making each other collaborators on your remote repos, so in a scenario like that you might just clone
-
Choose Forking: when you don’t have full permissions for the remote repository you are copying. For example, a lot of the Turing repos here you are not collaborators on – you aren’t allowed to willy nilly push your changes to the Turing staff repos. So if you wanted to save and push your changes that you’ve made to a repo, you’d need to have your own forked version that you could push to.
Example Workflow
Let’s say an instructor has created a repo for a live coding lesson that lives at http://github.com/turing/foo-bar, and there are two branches on that repository: tutorial-begin, where everyone should start, and tutorial-complete, with the completed solution.
If you clone down this repo, you will have access to both of those branches no problem. But now you can’t push your changes up to github because you don’t have collaborator access to that repo. If you’d like to be able to show your changes on your github, and keep track of your own version of the repo, a better workflow would be to fork.
Your workflow would involve a couple of steps and look like this:
- Fork the repo
- Clone down your fork
- Add the turing repo as a remote:
git remote add turing http://github.com/turing/foo-bar - Fetch all the branches from the newly added remote:
get fetch --all - Create a new local branch based on the turing
tutorial-beginbranch:git checkout -b tutorial-begin turing/tutorial-begin–>